Check deze link:
Posts tonen met het label LINUX. Alle posts tonen
Posts tonen met het label LINUX. Alle posts tonen
woensdag 21 maart 2007

maandag 12 maart 2007
Understanding the Linux File System
Once you have migrated from Windows to Linux you may notice that the file system is not what your accustomed to. Of the first things the average user needs to understand is the inner workings of the root file system and Linux core directory structure. To help you understand this structure, we have listed each directory explaining what it is commonly used for.
bin - contains the vital tools necessary to diagnose, repair and or get the system running
boot - houses the boot loader programs and configuration files
cdrom - shortcut to the CD/DVD drive
devbootstrap - contains files generated during the install of Ubuntu
dev - contains virtual files representing the hardware on your system
etc - central location for configuration files
home - where each users personal directory and files are located
initrd.img - symbolic link to ramdisk used to boot Linux
lib - shared system files
lost+found - where salvaged files get saved upon improper shutdown
media - directories that represent storage devices are found here
mnt - temporarily mounted external filesystems are located here
opt - optional additional software that is not a vital part of the system
proc - contains data about your system and current status
root - root users directory
sbin - administration programs are stored here
srv - network server configuration files go here
sys - Sysfs mount point used by the Linux kernel to administer your system hardware
tmp - temporary files are stored here
usr - shared files and data go here
var - constantly changing data is placed here
vmlinuz - symbolic link to the kernel file used at boot
USB Ubuntu 6.10
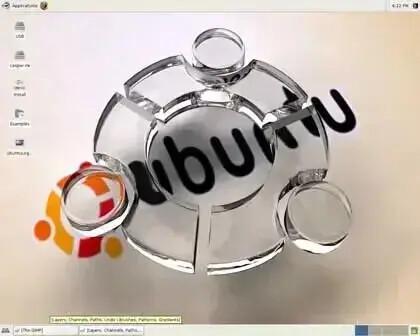
USB XUbuntu 6.10 This tutorial enables a user to install, boot and run Ubuntu from a USB flash thumb drive. By utilizing multiple partitions, the user can save changes and settings back to the flash thumb drive. Ubuntu is based on Debian Linux and is one of the more user friendly and stable releases. Ubuntu’s slogan is (it should “Just Work”, TM)
USB XUbuntu 6.10 Linux Screenshot:

Basic essentials:
- 1GB or larger USB flash drive
- Bootable Ubuntu Live CD
- USBubuntu.zip
Warning: DO NOT run makeboot.exe from your local hard drive!! It is intended to be run from your USB device. This tutorial requires you to reformat and partition your USB device. Please backup any information that may be on your USB device before proceeding.
The tutorial:
- Download the Ubuntu 6.10 ISO and burn it to CD
- Download the USBubuntu.zip
- Insert the XUbuntu Live CD and reboot your computer (boot from XUbuntu)
- Insert a 1GB or larger USB flash drive
- Open a terminal window and type sudo su
- Now type fdisk -l to list available drives/partitions (note which device is your flash drive typically /dev/sda)
- type umount /dev/sda1 (replacing sda1 with your flash drive partition)
- type fdisk /dev/sda (again replacing sda with your device)
- type p to show the existing partition and d to delete it
- type p again to show any remaining partitions (if partitions exist, repeat step 3)
- type n to make a new partition
- type p for primary partition
- type 1 to make this the first partition
- hit enter to use the default 1st cylinder
- type +700M to set the partition size
- type a to make this partition active
- type 1 to select partition 1
- type t to change the partition filesystem
- type 6 to select the fat16 file system
- type n to make another new partition
- type p for primary partition
- type 2 to make this the second partition
- hit enter to use the default cylinder
- hit enter again to use the default last cylinder
- type w to write the new partition table
- Type umount /dev/sda1 (replacing with your partition) to unmount the partition
- Type mkfs.vfat -F 16 -n USB /dev/sda1 to format the first partition (replace sda1 with your partiton)
- “Alternately you can try mkfs.vfat -F 32 -n USB /dev/sda1 (doesn’t always work)”
- Type mkfs.ext2 -b 4096 -L casper-rw /dev/sda2 to format the second partition (replace sda2 if necessary)
- Reboot your computer (boot back into Windows)”make sure to remove the XUbuntu CD”
- Extract the contents of the USBubuntu.zip to your “flash drive”.
- Browse to your “flash drive” and click the Makeboot.exe
- follow the on screen instructions.
- Reboot your computer and set your system BIOS to boot from USB-HDD or USB-ZIP. Also set the boot priority if necessary.
Ubuntu is notoriously much slower to boot than other linux versions. Once Ubuntu is up and running, it is stable and snappy.
Please note: This tutorial has been tested to work from a Windows XP computer. The .Net framework is required in order to run the Makeboot.exe application. You can download .Net framework Here
Abonneren op:
Posts (Atom)